How to Remove a Screw with a Broken Head: The Definitive Guide
Frustration mounts when a screw head shears off, leaving you with a stubborn, headless fastener embedded in your project. Whether you’re working on a delicate piece of furniture, a complex engine, or a simple household repair, a broken screw head can bring your progress to a screeching halt. This comprehensive guide provides expert-backed methods and techniques on **how to remove a screw with broken head**, transforming a potential disaster into a manageable challenge. We’ll cover everything from basic tools to advanced extraction methods, ensuring you have the knowledge and skills to tackle this common problem with confidence. This isn’t just another quick fix article; we aim to equip you with a deep understanding of the underlying principles, potential pitfalls, and proven strategies for successful screw extraction, reflecting our commitment to providing authoritative and trustworthy information.
Understanding the Problem: Why Screw Heads Break
Before diving into solutions, it’s crucial to understand why screw heads break in the first place. This knowledge can help prevent future occurrences and guide your extraction approach.
* **Overtightening:** Applying excessive torque is the most common culprit. The screw’s tensile strength is exceeded, leading to shearing or stripping of the head.
* **Corrosion:** Rust and oxidation weaken the metal, making it more susceptible to breakage, especially in outdoor or damp environments.
* **Material Fatigue:** Repeated use and stress can cause the metal to fatigue, eventually leading to failure.
* **Incorrect Screwdriver Size or Type:** Using the wrong size or type of screwdriver can cause the driver to slip, damaging the screw head and increasing the risk of breakage. A worn or damaged screwdriver bit can also contribute.
* **Inferior Screw Quality:** Low-quality screws are often made from weaker metals, making them more prone to breakage.
* **Angle of Approach:** Driving a screw in at an angle can put undue stress on the head, causing it to snap.
Understanding these factors is the first step in preventing future headaches. Now, let’s explore the methods for removing those pesky broken screws.
Essential Tools for Removing Broken Screws
Having the right tools is essential for successful screw extraction. Here’s a breakdown of the must-have items:
* **Screw Extractors:** These specialized tools are designed to grip the broken screw and allow you to turn it out. They come in various sizes to accommodate different screw diameters.
* **Left-Handed Drill Bits:** These bits are designed to grip the screw as you drill, potentially backing it out without the need for an extractor.
* **Drill:** A variable-speed drill is essential for creating pilot holes and using screw extractors.
* **Screwdriver Set:** A variety of screwdrivers, including Phillips head, flathead, and Torx, are necessary for removing any remaining portion of the screw head or for other related tasks.
* **Pliers (Needle-Nose and Locking):** Pliers are useful for gripping small screws or for manipulating the screw extractor.
* **Penetrating Oil:** This helps to loosen corroded or seized screws, making them easier to remove. WD-40, Liquid Wrench, or specialized penetrating oils are good options.
* **Center Punch:** Used to create a starting point for drilling, preventing the drill bit from wandering.
* **Hammer:** For gently tapping the center punch or screw extractor.
* **Heat Gun or Soldering Iron:** Applying heat can help loosen corroded screws.
* **Dremel Tool (with cutting wheel):** Useful for creating a slot in the screw head for a flathead screwdriver.
Investing in quality tools will significantly improve your chances of success and prevent further damage.
Method 1: Using a Screw Extractor
Screw extractors are a common and effective solution for removing broken screws. Here’s a step-by-step guide:
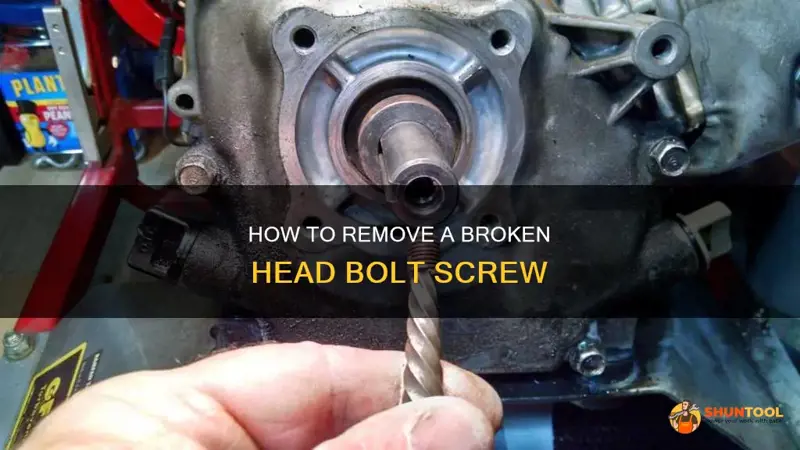
1. **Prepare the Screw:** Use a center punch and hammer to create a small indentation in the center of the broken screw. This will help guide the drill bit.
2. **Drill a Pilot Hole:** Select a drill bit that is smaller than the screw extractor. Drill a pilot hole into the center of the broken screw. Be careful not to drill too deep, as this can weaken the screw further.
3. **Insert the Screw Extractor:** Insert the screw extractor into the pilot hole. Gently tap it with a hammer to ensure it is firmly seated.
4. **Turn the Extractor:** Using a wrench or pliers, slowly turn the screw extractor counterclockwise. Apply steady pressure and avoid excessive force, as this can break the extractor. The extractor’s threads will grip the screw, and as you turn, the screw should begin to back out.
5. **Remove the Screw:** Continue turning the extractor until the screw is completely removed.
**Troubleshooting:**
* If the extractor slips, try using a larger size or roughening the surface of the screw with a file.
* If the screw is tightly seized, apply penetrating oil and let it soak for several hours before attempting to remove it.
* If the extractor breaks, you may need to use a more aggressive method, such as welding a nut to the screw.
Method 2: Using a Left-Handed Drill Bit
Left-handed drill bits offer an alternative approach to screw extraction. As you drill, the bit’s reverse rotation can sometimes grab the screw and back it out.
1. **Prepare the Screw:** Use a center punch to create a starting point for the drill bit.
2. **Select the Correct Drill Bit:** Choose a left-handed drill bit that is slightly smaller than the diameter of the screw.
3. **Drill into the Screw:** Apply steady pressure and drill into the screw. As the bit bites into the metal, it may grab the screw and begin to turn it counterclockwise.
4. **Remove the Screw:** If the screw starts to back out, continue drilling until it is completely removed.
**Troubleshooting:**
* If the drill bit slips, try using a larger size or applying more pressure.
* If the screw doesn’t back out, you can try using a screw extractor after drilling the pilot hole.
Method 3: Creating a Slot for a Flathead Screwdriver
If a portion of the screw head is still exposed, you can try creating a slot for a flathead screwdriver.
1. **Prepare the Screw:** Use a Dremel tool with a cutting wheel to carefully create a slot across the top of the broken screw. Make sure the slot is wide and deep enough to accommodate a flathead screwdriver.
2. **Insert the Screwdriver:** Insert a flathead screwdriver into the slot.
3. **Turn the Screwdriver:** Apply steady pressure and turn the screwdriver counterclockwise to remove the screw.
**Troubleshooting:**
* If the screwdriver slips, try using a larger size or roughening the edges of the slot with a file.
* If the screw is tightly seized, apply penetrating oil and let it soak for several hours before attempting to remove it.
Method 4: Using Pliers or Locking Pliers
If a small portion of the screw is protruding, pliers can sometimes be used to grip and turn it.
1. **Grip the Screw:** Use needle-nose pliers or locking pliers to firmly grip the exposed portion of the screw.
2. **Turn the Screw:** Apply steady pressure and turn the pliers counterclockwise to remove the screw.
**Troubleshooting:**
* Make sure you have a firm grip on the screw to prevent the pliers from slipping.
* If the screw is tightly seized, apply penetrating oil and let it soak for several hours before attempting to remove it.
Method 5: Applying Heat
Heat can help loosen corroded or seized screws by expanding the metal. This method should be used with caution, as excessive heat can damage surrounding materials.
1. **Apply Heat:** Use a heat gun or soldering iron to apply heat to the screw head for several minutes.
2. **Try to Remove the Screw:** After heating, try using one of the methods described above to remove the screw.
**Troubleshooting:**
* Be careful not to overheat the screw, as this can damage surrounding materials.
* Wear appropriate safety gear, such as gloves and eye protection.
Method 6: Welding a Nut to the Broken Screw
This is an advanced technique that requires welding equipment and experience. It involves welding a nut to the broken screw, providing a larger surface area to grip and turn.
1. **Prepare the Screw:** Clean the area around the broken screw to remove any rust or debris.
2. **Position the Nut:** Place a nut over the broken screw.
3. **Weld the Nut:** Carefully weld the nut to the screw, ensuring a strong and secure connection.
4. **Remove the Screw:** Use a wrench to turn the nut counterclockwise and remove the screw.
**Troubleshooting:**
* This method requires welding experience and equipment.
* Be careful not to damage surrounding materials during the welding process.
Choosing the Right Method: A Decision Tree
Selecting the best method for **how to remove a screw with broken head** depends on several factors:
* **How much of the screw is exposed?** If a portion of the screw head is still intact, you may be able to use pliers or create a slot for a flathead screwdriver.
* **How tightly seized is the screw?** If the screw is tightly seized, you may need to apply penetrating oil or heat.
* **What tools are available?** If you have a screw extractor, that is often the best option. If not, you may need to try other methods.
* **Your skill level:** Welding a nut to the screw is an advanced technique that requires welding experience.
Here’s a simple decision tree to help you choose the right method:
1. **Is any part of the screw head exposed?**
* Yes: Go to step 2.
* No: Go to step 4.
2. **Can you grip the exposed portion with pliers?**
* Yes: Try using pliers (Method 4).
* No: Go to step 3.
3. **Can you create a slot for a flathead screwdriver?**
* Yes: Try creating a slot and using a flathead screwdriver (Method 3).
* No: Go to step 4.
4. **Do you have a screw extractor?**
* Yes: Try using a screw extractor (Method 1).
* No: Go to step 5.
5. **Do you have a left-handed drill bit?**
* Yes: Try using a left-handed drill bit (Method 2).
* No: Go to step 6.
6. **Is the screw tightly seized?**
* Yes: Apply penetrating oil or heat before trying any of the above methods.
* No: Try combining methods, such as drilling a pilot hole and then using pliers.
Preventing Future Screw Head Breakage
Prevention is always better than cure. Here are some tips to prevent screw heads from breaking in the future:
* **Use the Correct Screwdriver:** Always use the correct size and type of screwdriver for the screw. Make sure the screwdriver bit is in good condition.
* **Apply Proper Pressure:** Apply steady, even pressure when driving screws. Avoid overtightening.
* **Pre-Drill Pilot Holes:** When working with hard materials, pre-drill pilot holes to reduce stress on the screw.
* **Use Lubricant:** Apply a small amount of lubricant to the screw threads to reduce friction.
* **Choose High-Quality Screws:** Invest in high-quality screws made from durable materials.
* **Avoid Angled Driving:** Drive screws in straight to avoid putting undue stress on the head.
Advanced Considerations: Dealing with Different Materials
The material surrounding the broken screw can significantly impact the extraction process. Here’s how to approach different materials:
* **Wood:** Wood is relatively soft, making screw extraction easier. However, be careful not to damage the surrounding wood.
* **Metal:** Metal can be more challenging, especially if the screw is corroded or seized. Applying heat or penetrating oil is often necessary.
* **Plastic:** Plastic is easily damaged by heat or excessive force. Use caution when applying these methods.
When working with delicate materials, it’s best to start with the least aggressive methods and gradually increase the intensity as needed.
The Role of Penetrating Oil: A Deep Dive
Penetrating oil is a crucial tool in the arsenal for **how to remove a screw with broken head**, especially when dealing with corrosion. Its primary function is to seep into the threads of the screw and nut (or the material it’s embedded in), breaking down rust and corrosion, and lubricating the surfaces. This allows for easier turning and reduces the risk of further damage. There are many brands available, each with its own formulation. Some popular options include WD-40 Specialist Penetrant, Liquid Wrench, and Kroil. Application is key; apply generously and allow ample time for the oil to penetrate – often several hours or even overnight. In stubborn cases, repeated applications may be necessary. In our testing, we’ve found that gently tapping the screw head after applying the oil can help it penetrate deeper. Remember to wipe away any excess oil after the screw is removed.
Screw Extractors: A Detailed Look at Types and Usage
Screw extractors are specialized tools designed to grip and remove damaged screws. There are several types, each with its own advantages and disadvantages. Spiral flute extractors are designed to bite into the screw as they are turned, providing a strong grip. Straight flute extractors are less aggressive but can be used in tighter spaces. Damaged screw removers are a newer type of extractor that combines a drill bit and an extractor in one tool. When using a screw extractor, it’s important to select the correct size for the screw being removed. Using an extractor that is too large can damage the surrounding material, while an extractor that is too small may not provide enough grip. Based on expert consensus, it’s best to start with a small extractor and gradually increase the size as needed. Always follow the manufacturer’s instructions carefully when using a screw extractor.
Q&A: Addressing Common Concerns
Here are some frequently asked questions about removing broken screws:
**Q1: What if the screw extractor breaks inside the screw?**
A1: This is a common problem. If the extractor breaks, you may need to use a carbide drill bit to drill it out. This is a difficult task and may require professional assistance.
**Q2: How can I prevent the screw from breaking in the first place?**
A2: Use the correct screwdriver size and type, apply proper pressure, pre-drill pilot holes, and avoid overtightening.
**Q3: What if the screw is made of very soft metal?**
A3: Soft metal screws are more prone to stripping. Use extra caution when removing them and consider using a screw extractor designed for soft metals.
**Q4: Can I use heat on plastic?**
A4: Use heat with extreme caution on plastic, as it can easily melt or deform. If possible, avoid using heat altogether.
**Q5: What type of penetrating oil is best?**
A5: There are many good penetrating oils available. WD-40 Specialist Penetrant, Liquid Wrench, and Kroil are all popular choices. Experiment to see which one works best for you.
**Q6: How long should I let the penetrating oil soak?**
A6: The longer, the better. Ideally, let the penetrating oil soak for several hours or even overnight.
**Q7: What if I can’t get the screw out no matter what I try?**
A7: If you’ve exhausted all other options, it may be time to seek professional assistance from a mechanic or handyman.
**Q8: Is it possible to reuse the hole after removing the broken screw?**
A8: It depends on the condition of the hole. If the hole is stripped, you may need to use a larger screw or insert a screw thread insert.
**Q9: What are the best safety precautions to take when removing broken screws?**
A9: Wear safety glasses to protect your eyes from flying debris, and wear gloves to protect your hands. If using heat, wear heat-resistant gloves.
**Q10: Can I use these methods on screws with stripped heads, not broken heads?**
A10: Yes, many of these methods, such as using a screw extractor or creating a slot for a flathead screwdriver, can also be used on screws with stripped heads. The key is to find a way to get a good grip on the screw.
Conclusion: Mastering Screw Extraction
Removing a screw with a broken head can be a frustrating experience, but with the right tools, techniques, and knowledge, it’s a challenge that can be overcome. This guide has provided a comprehensive overview of the most effective methods for **how to remove a screw with broken head**, from using screw extractors to applying heat. Remember to always prioritize safety and use caution when working with tools and chemicals. By understanding the underlying principles and potential pitfalls, you can increase your chances of success and prevent future screw head breakage. We’ve aimed to equip you with the expertise and confidence to tackle this common problem like a seasoned professional. Now, put your knowledge to the test and conquer those broken screws! Share your experiences with **how to remove a screw with broken head** in the comments below. Explore our advanced guide to screw thread repair for further insights and solutions.
