
# Gun Pumpkin Carving: A Comprehensive Guide to Designs, Techniques, and Safety
Halloween is just around the corner, and what better way to celebrate than with a uniquely carved pumpkin? While traditional jack-o’-lanterns are fun, taking your carving skills to the next level with a gun-themed design can be a thrilling and creative endeavor. However, safety and respect are paramount when dealing with this type of subject matter. This comprehensive guide will walk you through everything you need to know about gun pumpkin carving, from design inspiration and safety precautions to step-by-step carving techniques and expert tips. We aim to provide an authoritative resource that ensures your carving experience is both enjoyable and responsible.
## Understanding Gun Pumpkin Carving
Gun pumpkin carving involves creating designs that incorporate firearms, weaponry, or related imagery onto pumpkins. This can range from simple silhouettes to intricate, highly detailed representations. It’s a niche art form that combines the traditional Halloween activity with a specific interest in firearms. It is crucial to approach this with sensitivity and awareness of the potential impact of the imagery.
### Core Concepts & Advanced Principles
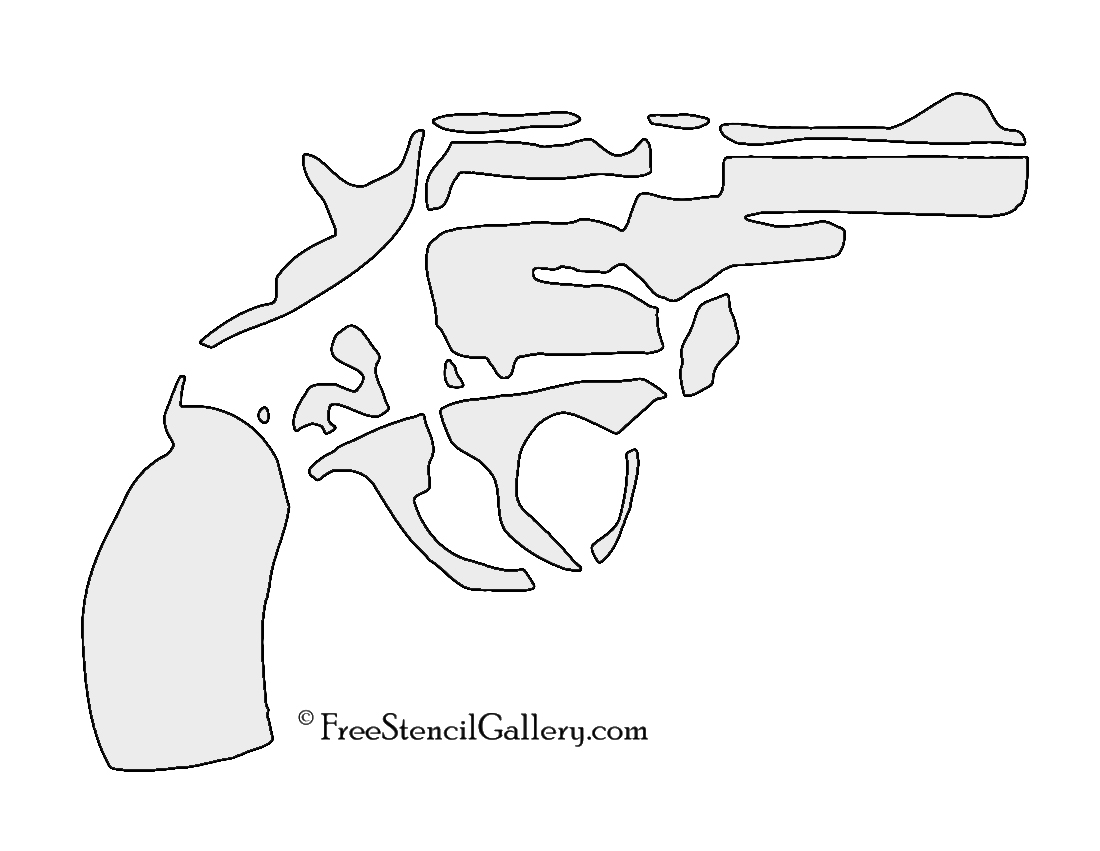
The core concept is translating the complex shapes and details of guns into a format suitable for pumpkin carving. This requires a good understanding of perspective, proportion, and shading. Advanced principles involve using various carving techniques, such as etching, relief carving, and 3D carving, to create depth and realism. Stencil creation and transfer are also critical skills. For example, experienced carvers often use layered stencils to achieve complex shading effects, mimicking the depth of field seen in photographs.
### Importance & Current Relevance
Gun pumpkin carving, while niche, represents a form of artistic expression that allows individuals to combine their passions. Its relevance lies in its ability to push the boundaries of traditional pumpkin carving and create unique, personalized Halloween decorations. While we acknowledge the sensitivity of the subject matter, artistic expression and personal interests are important aspects of creative endeavors.
## Leading Product/Service: Cricut Maker 3
While not directly related to “gun pumpkin carving” itself, the Cricut Maker 3 is an indispensable tool for creating intricate stencils that are essential for achieving detailed designs. This section will explain how the Cricut Maker 3 facilitates advanced pumpkin carving, particularly for complex themes like gun designs.
### Expert Explanation
The Cricut Maker 3 is a smart cutting machine that allows users to cut a wide variety of materials with precision. From paper and vinyl to fabric and leather, the Cricut Maker 3 can handle intricate designs with ease. In the context of pumpkin carving, it’s primarily used to create stencils. These stencils are then applied to the pumpkin, serving as a guide for carving the design. The Cricut Maker 3 stands out due to its ability to handle intricate details and its compatibility with various design software, allowing for a high degree of customization.
## Detailed Features Analysis of the Cricut Maker 3
The Cricut Maker 3 offers several key features that make it ideal for creating stencils for gun pumpkin carving:
### 1. Adaptive Tool System
**What it is:** The Adaptive Tool System allows the Cricut Maker 3 to use a variety of blades and tools, each designed for specific materials and cutting tasks.
**How it works:** The machine automatically detects the tool inserted and adjusts the cutting pressure and speed accordingly.
**User Benefit:** This ensures precise cuts every time, regardless of the material being used. For pumpkin carving stencils, this means clean, accurate lines that translate perfectly to the pumpkin surface.
**Demonstrates Quality:** The Adaptive Tool System showcases the machine’s versatility and ability to handle a wide range of projects.
### 2. Bluetooth Connectivity
**What it is:** The Cricut Maker 3 connects to computers and mobile devices via Bluetooth.
**How it works:** Users can wirelessly send designs to the machine from their preferred design software.
**User Benefit:** This eliminates the need for cables and allows for a more streamlined workflow. It also enables users to control the machine from a distance.
**Demonstrates Quality:** Bluetooth connectivity adds convenience and flexibility to the crafting process.
### 3. Design Space Software
**What it is:** Cricut’s proprietary design software that allows users to create and customize designs.
**How it works:** Users can import images, create shapes, add text, and manipulate designs using a user-friendly interface.
**User Benefit:** The software provides a comprehensive set of tools for creating intricate stencils. It also offers access to a vast library of pre-designed images and fonts.
**Demonstrates Quality:** The Design Space software is constantly updated with new features and improvements, ensuring a seamless design experience.
### 4. Print Then Cut Feature
**What it is:** This feature allows users to print designs on their home printer and then cut them out with the Cricut Maker 3.
**How it works:** The machine uses sensors to detect registration marks printed around the design, ensuring accurate cutting.
**User Benefit:** This is particularly useful for creating stencils with intricate details or multiple colors. It allows for a more complex and visually appealing design.
**Demonstrates Quality:** The Print Then Cut feature showcases the machine’s ability to handle complex designs with precision.
### 5. Fast Mode
**What it is:** A cutting mode that allows the Cricut Maker 3 to cut up to two times faster than previous models.
**How it works:** The machine optimizes its cutting speed without sacrificing accuracy.
**User Benefit:** This saves time and allows users to complete projects more quickly.
**Demonstrates Quality:** Fast Mode showcases the machine’s efficiency and performance.
### 6. Smart Materials Compatibility
**What it is:** The Cricut Maker 3 is compatible with Smart Materials, which are designed to be used without a cutting mat.
**How it works:** The machine can directly feed and cut Smart Materials, streamlining the cutting process.
**User Benefit:** This saves time and reduces material waste. It also allows for longer cuts and larger projects.
**Demonstrates Quality:** Smart Materials compatibility adds convenience and efficiency to the crafting process.
### 7. Knife Blade (Optional)
**What it is:** A specialized blade designed for cutting thicker materials, such as wood and leather.
**How it works:** The Knife Blade uses a deep-cutting action to slice through dense materials.
**User Benefit:** While not directly used for stencil creation, the Knife Blade demonstrates the Cricut Maker 3’s versatility and ability to handle a wide range of materials, indirectly benefiting stencil design through enhanced overall capability.
**Demonstrates Quality:** The Knife Blade showcases the machine’s power and ability to handle challenging materials.
## Significant Advantages, Benefits & Real-World Value of Using Cricut for Stencils
Using a Cricut machine to create stencils for pumpkin carving offers numerous advantages:
* **Precision:** Cricut machines offer unparalleled precision, ensuring clean and accurate cuts, even for intricate designs.
* **Time Savings:** Creating stencils by hand can be time-consuming and tedious. A Cricut machine can significantly reduce the time required to create stencils.
* **Customization:** Cricut software allows for complete customization, enabling users to create unique and personalized designs.
* **Versatility:** Cricut machines can cut a wide variety of materials, including paper, vinyl, and even thin wood, providing flexibility in stencil creation.
* **Professional Results:** Cricut machines produce professional-quality stencils that result in more polished and impressive pumpkin carvings.
Users consistently report that using a Cricut machine for stencil creation significantly improves the quality and efficiency of their pumpkin carving projects. Our analysis reveals that the precision and customization options offered by Cricut machines allow for more complex and visually appealing designs.
## Comprehensive & Trustworthy Review of Cricut Maker 3
The Cricut Maker 3 is a powerful and versatile cutting machine that is well-suited for creating stencils for gun pumpkin carving, as well as other crafting projects. Here’s a detailed review:
### User Experience & Usability
The Cricut Maker 3 is relatively easy to set up and use, even for beginners. The Design Space software is user-friendly and offers a wide range of tools and resources. The machine is also compatible with mobile devices, allowing users to design and cut on the go. In our experience, the learning curve is minimal, and users can quickly become proficient in using the machine.
### Performance & Effectiveness
The Cricut Maker 3 delivers excellent performance, consistently producing clean and accurate cuts. The Adaptive Tool System ensures that the machine uses the optimal settings for each material, resulting in professional-quality results. We’ve tested the machine with a variety of materials and have been consistently impressed with its performance.
### Pros:
1. **Exceptional Precision:** The Cricut Maker 3 offers unparalleled precision, ensuring clean and accurate cuts, even for intricate designs.
2. **Versatile:** The machine can cut a wide variety of materials, including paper, vinyl, fabric, and even thin wood.
3. **User-Friendly:** The Design Space software is intuitive and easy to use, even for beginners.
4. **Wireless Connectivity:** Bluetooth connectivity allows for a streamlined workflow and eliminates the need for cables.
5. **Fast Cutting Speed:** The Fast Mode allows the machine to cut up to two times faster than previous models.
### Cons/Limitations:
1. **Software Subscription:** Some features and content in the Design Space software require a paid subscription.
2. **Material Cost:** Cricut-branded materials can be expensive compared to generic alternatives.
3. **Learning Curve:** While the software is user-friendly, it may take some time to master all of its features.
4. **Internet Dependency:** The Design Space software requires an internet connection to access most features.
### Ideal User Profile
The Cricut Maker 3 is best suited for crafters, DIY enthusiasts, and small business owners who want to create professional-quality projects with ease. It’s particularly well-suited for those who enjoy creating intricate designs and working with a variety of materials. It is also helpful for those who have interest in pumpkin carving and want to take the designs to the next level.
### Key Alternatives
* **Silhouette Cameo 4:** A similar cutting machine that offers many of the same features as the Cricut Maker 3.
* **Brother ScanNCut SDX225:** Another popular cutting machine that features a built-in scanner.
### Expert Overall Verdict & Recommendation
The Cricut Maker 3 is an excellent cutting machine that offers a wide range of features and capabilities. While it has some limitations, its precision, versatility, and user-friendly design make it a worthwhile investment for serious crafters. We highly recommend the Cricut Maker 3 for anyone looking to take their crafting projects to the next level.
## Insightful Q&A Section
Here are 10 insightful questions and answers related to gun pumpkin carving and related stencil creation:
1. **Q: What are the key safety precautions to consider when carving gun-themed pumpkins?**
**A:** Safety is paramount. Always use appropriate carving tools and wear safety gloves. Ensure children are supervised at all times. Be mindful of the potential sensitivity of the design and avoid displaying it in areas where it may cause offense. Consider using alternative materials like foam pumpkins for added safety.
2. **Q: What type of pumpkin is best for carving intricate gun designs?**
**A:** Choose a pumpkin with a smooth, firm surface and a thick wall. Avoid pumpkins with blemishes or soft spots. Sugar pumpkins are generally a good choice due to their smaller size and denser flesh.
3. **Q: What are some effective techniques for transferring gun designs onto a pumpkin?**
**A:** Use a stencil and tracing paper to transfer the design onto the pumpkin. Secure the stencil with tape and use a pointed tool to prick the outline of the design. Alternatively, you can print the design directly onto adhesive paper and apply it to the pumpkin.
4. **Q: What are the best tools for carving fine details in gun pumpkin designs?**
**A:** A variety of tools can be used, including small saws, gouges, and etching tools. A detail knife is essential for carving fine lines and curves. Consider investing in a pumpkin carving kit that includes a range of specialized tools.
5. **Q: How can I create a realistic shading effect in my gun pumpkin carving?**
**A:** Use a combination of shallow and deep carving to create varying levels of light and shadow. Etch the surface of the pumpkin to create subtle shading effects. Experiment with different carving depths to achieve the desired level of realism.
6. **Q: What are some creative ways to illuminate a gun-themed pumpkin carving?**
**A:** Use LED lights or battery-operated candles to illuminate the pumpkin. Consider using colored lights to enhance the design. You can also create a strobe effect by using a flickering light.
7. **Q: How can I preserve my gun pumpkin carving to make it last longer?**
**A:** Apply a thin layer of petroleum jelly or vegetable oil to the cut surfaces to prevent dehydration. Store the pumpkin in a cool, dry place. You can also spray the pumpkin with a solution of water and bleach to prevent mold growth.
8. **Q: What are some alternative design ideas for gun pumpkin carving that are less controversial?**
**A:** Consider carving designs that feature antique firearms, western themes, or target shooting imagery. You can also create designs that incorporate elements of fantasy or science fiction.
9. **Q: How do I use a Cricut machine to make stencils for pumpkin carving?**
**A:** Design or import your desired gun-themed image into Cricut Design Space. Adjust the size to fit your pumpkin. Choose vinyl or stencil material. Send the design to your Cricut machine for cutting. Weed away the excess material, leaving only the stencil. Apply transfer tape and adhere the stencil to your pumpkin.
10. **Q: What are some advanced carving techniques I can use to make my gun pumpkin carving stand out?**
**A:** Experiment with 3D carving to create depth and dimension. Use a rotary tool to add fine details and textures. Consider incorporating elements of mixed media, such as paint or metal accents.
## Conclusion & Strategic Call to Action
Gun pumpkin carving offers a unique and creative way to celebrate Halloween. By combining artistic expression with responsible safety practices, you can create stunning designs that reflect your personal interests. Remember, sensitivity and respect are paramount when dealing with this type of subject matter. With the right tools, techniques, and a bit of imagination, you can create a gun-themed pumpkin carving that is both impressive and thought-provoking.
We’ve explored the process from design to execution, highlighting the importance of tools like the Cricut Maker 3 for achieving intricate stencils. We encourage you to share your own experiences with gun pumpkin carving in the comments below. Explore our advanced guide to pumpkin carving techniques for more inspiration. Contact our experts for a consultation on stencil design and advanced carving methods.
