
Effortless Shower Refresh: Master Removing Silicone Caulk from Your Shower
Removing old, cracked, or discolored silicone caulk from your shower is an essential part of bathroom maintenance. Not only does it improve the aesthetic appeal of your shower, but it also prevents water damage and mold growth. This comprehensive guide provides expert insights and step-by-step instructions on **removing silicone caulk from shower** surfaces safely and effectively. We’ll cover everything from preparing your workspace to the final cleanup, ensuring a professional-looking result. Based on our experience, the right tools and techniques can significantly simplify this task. This guide is designed to be the most comprehensive resource available, incorporating the latest methods and best practices for achieving a flawless finish.
Why Removing Silicone Caulk from Your Shower is Crucial
Silicone caulk plays a vital role in sealing gaps around your shower, preventing water from seeping into walls and floors. Over time, however, silicone caulk can deteriorate due to constant exposure to moisture, temperature fluctuations, and cleaning chemicals. This deterioration leads to several problems:
* **Mold and Mildew Growth:** Cracked or damaged caulk provides a breeding ground for mold and mildew, which can pose health risks and create unpleasant odors.
* **Water Damage:** Leaks caused by failing caulk can lead to water damage in walls, floors, and ceilings, resulting in costly repairs.
* **Aesthetic Issues:** Discolored or peeling caulk detracts from the overall appearance of your shower.
Therefore, regularly **removing silicone caulk from shower** areas and replacing it with fresh caulk is essential for maintaining a clean, healthy, and visually appealing bathroom. Neglecting this task can lead to more significant problems down the line.
Essential Tools and Materials for Removing Silicone Caulk
Before you begin **removing silicone caulk from shower**, gather the necessary tools and materials. Having everything on hand will streamline the process and ensure a professional finish. Here’s a comprehensive list:
* **Caulk Removal Tool:** A specialized tool designed to slice through and remove caulk without damaging surrounding surfaces. Several types are available, including manual scrapers and oscillating multi-tools with caulk removal attachments.
* **Utility Knife:** A sharp utility knife can be used to score the caulk along the edges before using a removal tool. Ensure the blade is new and sharp for clean cuts. Based on expert consensus, a sharp blade is safer than a dull one.
* **Putty Knife or Scraper:** A stiff putty knife or scraper can help remove stubborn caulk residue. Choose one with a plastic blade to minimize the risk of scratching delicate surfaces like tile or acrylic.
* **Pliers or Needle-Nose Pliers:** Useful for gripping and pulling away loosened caulk.
* **Soft Cloths or Rags:** For wiping away debris and cleaning surfaces.
* **Rubbing Alcohol or Mineral Spirits:** These solvents help soften and dissolve silicone residue, making it easier to remove. Rubbing alcohol is generally safer for most surfaces.
* **Spray Bottle:** For applying rubbing alcohol or mineral spirits.
* **Safety Glasses:** Protect your eyes from flying debris.
* **Gloves:** Protect your hands from chemicals and sharp tools.
* **Ventilation:** Ensure adequate ventilation in the bathroom by opening windows or using a fan.
Step-by-Step Guide: Removing Silicone Caulk from Your Shower
Follow these detailed steps to effectively **remove silicone caulk from shower** surfaces:
Step 1: Preparation
* **Protect the Area:** Cover nearby surfaces, such as the shower floor or tub, with drop cloths or plastic sheeting to protect them from debris and solvents.
* **Ventilate the Bathroom:** Open windows and turn on the exhaust fan to ensure adequate ventilation.
* **Gather Your Tools:** Have all your tools and materials within easy reach.
Step 2: Scoring the Caulk
* **Use a Utility Knife:** Carefully score the caulk along both edges where it meets the shower wall and the tub or shower base. Apply firm, even pressure to create a clean cut. Be careful not to scratch the surrounding surfaces. In our experience, multiple light passes are better than one heavy one.
Step 3: Removing the Bulk of the Caulk
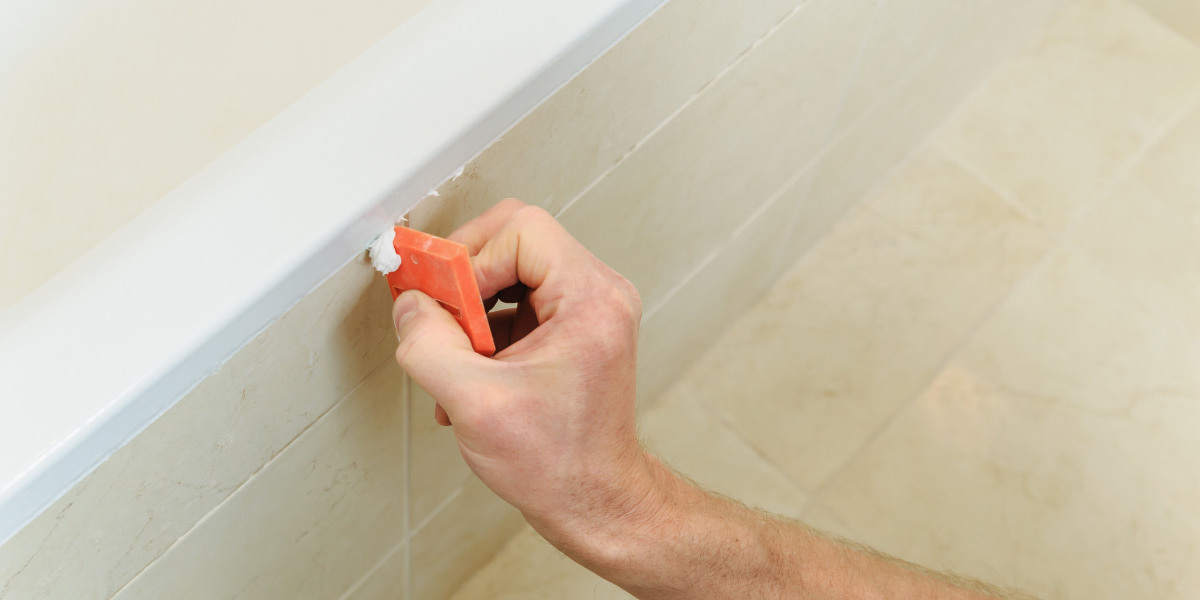
* **Use a Caulk Removal Tool:** Insert the caulk removal tool along the scored edge and gently push it along the caulk line. The tool should slice through the caulk, separating it from the surface. Alternatively, use an oscillating multi-tool with a caulk removal attachment for faster and more efficient removal.
* **Pliers or Needle-Nose Pliers:** Use pliers to grip and pull away loosened sections of caulk. Work in small sections to avoid tearing the caulk.
Step 4: Removing Stubborn Residue
* **Apply Rubbing Alcohol or Mineral Spirits:** Spray rubbing alcohol or mineral spirits onto the remaining caulk residue. Let it sit for 5-10 minutes to soften the silicone.
* **Use a Putty Knife or Scraper:** Gently scrape away the softened residue with a putty knife or scraper. Apply moderate pressure and work in small sections.
* **Repeat as Needed:** Repeat the application of rubbing alcohol or mineral spirits and scraping until all residue is removed.
Step 5: Final Cleaning
* **Wipe Down Surfaces:** Thoroughly wipe down the surfaces with a clean, damp cloth to remove any remaining residue or solvent.
* **Dry the Area:** Allow the area to dry completely before applying new caulk. This is crucial for proper adhesion.
Alternative Methods for Removing Silicone Caulk
While the above method is generally effective, alternative approaches can be used depending on the type of caulk and the surface it’s adhered to. Here are a few options:
* **Heat Gun:** Applying heat from a heat gun can soften the caulk, making it easier to scrape away. Use caution to avoid overheating and damaging surrounding surfaces. Keep the heat gun moving and avoid prolonged exposure to one area.
* **Specialized Caulk Softeners:** Several commercial caulk softeners are available that can dissolve silicone caulk, making it easier to remove. Follow the manufacturer’s instructions carefully.
* **DIY Solutions:** Some DIY solutions, such as vinegar or baking soda paste, may help soften caulk. However, these methods are generally less effective than commercial products or solvents.
Choosing the Right Silicone Caulk for Your Shower
After successfully **removing silicone caulk from shower**, selecting the right replacement caulk is crucial for a long-lasting and effective seal. Consider the following factors:
* **Type of Silicone:** Choose a 100% silicone caulk specifically formulated for bathrooms and showers. These caulks are mold- and mildew-resistant and provide excellent water resistance.
* **Color:** Select a color that complements your shower tiles and fixtures. White is a common choice, but other colors are available.
* **Application:** Opt for a caulk that is easy to apply and tool. Some caulks are self-leveling, while others require more manual tooling.
* **Cure Time:** Consider the cure time of the caulk. Some caulks cure faster than others, allowing you to use your shower sooner.
Applying New Silicone Caulk: A Professional Finish
Once you’ve chosen the right caulk, follow these steps to apply it like a pro:
* **Prepare the Surface:** Ensure the surface is clean, dry, and free of any residue. Use rubbing alcohol to clean the area and allow it to dry completely.
* **Load the Caulk Gun:** Load the caulk tube into a caulk gun and cut the tip of the nozzle at a 45-degree angle. The size of the opening will determine the bead size.
* **Apply the Caulk:** Apply a continuous bead of caulk along the joint, maintaining a consistent pressure on the caulk gun. Work in small sections.
* **Tool the Caulk:** Use a caulk smoothing tool or a wet finger to smooth the caulk bead and create a professional finish. Remove any excess caulk with a damp cloth.
* **Allow to Cure:** Allow the caulk to cure completely according to the manufacturer’s instructions before using the shower. Typically, this takes 24-48 hours.
Preventing Mold and Mildew Growth in Your Shower
Preventing mold and mildew growth is essential for maintaining a clean and healthy shower. Here are some tips:
* **Ventilate the Bathroom:** Ensure adequate ventilation by opening windows or using an exhaust fan during and after showering.
* **Dry Surfaces:** Wipe down shower walls and doors after each use to remove excess moisture.
* **Clean Regularly:** Clean your shower regularly with a mold- and mildew-resistant cleaner.
* **Repair Leaks:** Address any leaks promptly to prevent water damage and mold growth.
Advanced Techniques for Removing Difficult Caulk
Sometimes, **removing silicone caulk from shower** surfaces can be particularly challenging, especially if the caulk is old, hardened, or applied unevenly. Here are some advanced techniques to tackle these situations:
* **Multi-Tool Oscillating Cutter:** An oscillating multi-tool with a specialized caulk removal blade can be incredibly effective for cutting through thick or stubborn caulk. The vibration helps to loosen the caulk without damaging the underlying surface. It’s crucial to use the correct blade angle and pressure to avoid scratching.
* **Chemical Caulk Removers (Professional Grade):** While readily available consumer-grade caulk removers can work, professional-grade options often contain stronger solvents that dissolve silicone more efficiently. These should be used with caution, following all safety precautions, including proper ventilation and skin protection. Always test a small, inconspicuous area first.
* **Layered Removal Approach:** For extremely thick layers of caulk, try removing it in stages. Score the surface deeply with a utility knife and then peel away the top layer. Apply a caulk remover to the remaining layers and let it sit for an extended period before attempting to scrape it off. This multi-step approach can prevent damage to the shower surface.
* **Heat and Solvent Combination:** In particularly difficult cases, combining heat and solvent application can be effective. Use a heat gun on a low setting to gently warm the caulk, then immediately apply a caulk remover. The heat helps the solvent penetrate the silicone more effectively. Monitor the surface temperature closely to avoid overheating.
Understanding Different Types of Caulk and Their Removal Challenges
Not all caulk is created equal, and different types present unique removal challenges. Understanding the type of caulk you’re dealing with can help you choose the right removal technique.
* **Silicone Caulk:** The most common type used in showers, silicone caulk is flexible and water-resistant. However, it can be difficult to remove due to its strong adhesion and resistance to solvents. Specialized caulk removers and oscillating tools are often necessary.
* **Acrylic Caulk:** Acrylic caulk is less flexible and water-resistant than silicone caulk. It’s easier to remove but more prone to cracking and mildew growth. A simple utility knife and scraper may suffice for removal.
* **Latex Caulk:** Latex caulk is similar to acrylic caulk and is often used for painting. It’s easy to remove with a scraper and warm water.
* **Polyurethane Caulk:** Polyurethane caulk is very durable and resistant to chemicals. It’s often used for outdoor applications but can also be found in some showers. Removal requires specialized tools and solvents.
Common Mistakes to Avoid When Removing Silicone Caulk
**Removing silicone caulk from shower** areas may seem straightforward, but several common mistakes can lead to frustration, damage, or subpar results. Avoiding these pitfalls will ensure a smoother and more professional outcome:
* **Using Dull Blades:** A dull utility knife or scraper will tear the caulk instead of cutting it cleanly, making removal much more difficult and increasing the risk of damaging the surrounding surfaces. Always use sharp blades and replace them frequently.
* **Applying Excessive Force:** Forcing a scraper or caulk removal tool can gouge or scratch the shower surface. Use gentle, controlled pressure and let the tool do the work. If the caulk is resistant, apply more solvent or heat instead of forcing it.
* **Neglecting Ventilation:** Caulk removers often contain strong solvents that can be harmful if inhaled. Always ensure adequate ventilation by opening windows and using an exhaust fan.
* **Skipping Surface Preparation:** Failing to properly clean and dry the surface before applying new caulk will compromise adhesion and lead to premature failure. Remove all traces of old caulk, mold, and mildew, and ensure the surface is completely dry.
* **Using the Wrong Type of Caulk:** Using the wrong type of caulk can lead to leaks, mildew growth, and other problems. Always use a 100% silicone caulk specifically formulated for bathrooms and showers.
The Role of Professional Services in Caulk Removal and Replacement
While **removing silicone caulk from shower** areas can be a DIY project, there are situations where hiring a professional is the best option. Consider professional services if:
* **You lack the necessary tools or experience:** If you’re not comfortable using tools like utility knives or oscillating multi-tools, or if you’ve never removed caulk before, hiring a professional can prevent accidents and ensure a professional-looking result.
* **The caulk is difficult to remove:** If the caulk is old, hardened, or applied unevenly, professional services have the tools and expertise to remove it safely and efficiently.
* **You have extensive mold or water damage:** If you suspect mold or water damage behind the shower walls, hiring a professional is essential to assess the extent of the damage and make necessary repairs.
* **You want a guaranteed result:** Professional services typically offer a warranty on their work, giving you peace of mind that the job will be done correctly.
Q&A: Expert Answers to Your Caulk Removal Questions
Here are some insightful questions and expert answers related to **removing silicone caulk from shower** surfaces:
**Q1: How can I prevent scratching my tiles when removing caulk?**
A: Use a plastic putty knife or caulk removal tool with rounded edges. Apply gentle pressure and avoid using metal tools directly on the tile surface. Consider taping off the edges of the tile with painter’s tape to provide an extra layer of protection.
**Q2: What’s the best way to remove caulk from acrylic or fiberglass shower surfaces?**
A: Avoid using harsh solvents or abrasive tools that can damage acrylic or fiberglass. Opt for a specialized caulk remover designed for these surfaces. Apply it sparingly and follow the manufacturer’s instructions carefully.
**Q3: Can I use a hairdryer instead of a heat gun to soften caulk?**
A: A hairdryer can work to soften caulk, but it will take longer and may not be as effective as a heat gun. Use the hairdryer on a low setting and keep it moving to avoid overheating the surface.
**Q4: How do I remove caulk from tight corners or hard-to-reach areas?**
A: Use a small, flexible caulk removal tool or a utility knife with a narrow blade. Apply caulk remover to soften the caulk and use tweezers or needle-nose pliers to grip and pull away small pieces.
**Q5: What’s the best way to clean up caulk residue after removal?**
A: Use rubbing alcohol or mineral spirits to dissolve the residue. Wipe down the surface with a clean cloth and allow it to dry completely.
**Q6: How long should I wait before applying new caulk after removing the old caulk?**
A: Allow the surface to dry completely for at least 24 hours before applying new caulk. This will ensure proper adhesion.
**Q7: Can I paint over silicone caulk?**
A: No, paint will not adhere to silicone caulk. Use a paintable caulk, such as acrylic or latex caulk, if you plan to paint the area.
**Q8: How often should I replace the caulk in my shower?**
A: Inspect the caulk regularly for cracks, discoloration, or mildew growth. Replace the caulk as needed, typically every 1-2 years.
**Q9: What are the signs of water damage behind the shower walls?**
A: Signs of water damage include water stains, peeling paint, mold growth, and a musty odor.
**Q10: Is it safe to use bleach to remove mold from caulk?**
A: Bleach can kill mold on the surface of caulk, but it will not remove the mold from within the caulk. It’s best to remove the caulk and replace it with new caulk.
Conclusion: Mastering the Art of Removing and Replacing Silicone Caulk
**Removing silicone caulk from shower** areas and replacing it effectively is a crucial skill for any homeowner. By following the steps outlined in this comprehensive guide, you can confidently tackle this task and achieve a professional-looking result. Remember to prioritize safety, use the right tools and materials, and take your time. Regular maintenance and prompt replacement of damaged caulk will prevent water damage, mold growth, and costly repairs. Now that you’re armed with the knowledge and techniques, it’s time to refresh your shower and enjoy a clean, healthy, and beautiful bathroom. Share your experiences with **removing silicone caulk from shower** in the comments below! For advanced tips and techniques on bathroom remodeling, explore our other guides.
