
## What to Clean a Keyboard With: The Definitive Guide to a Sparkling Clean Keyboard
Is your keyboard a sticky, dusty, germ-ridden mess? Are you tired of crumbs falling out every time you type? You’re not alone. Keyboards are notorious for accumulating grime, and knowing *what to clean a keyboard with* is essential for hygiene, performance, and longevity. This comprehensive guide will provide you with expert-backed methods, tools, and best practices to restore your keyboard to its former glory, regardless of whether it’s a mechanical gaming keyboard, a laptop keyboard, or a simple wireless model. We’ll delve into the specifics of cleaning different keyboard types, addressing potential pitfalls, and ensuring you achieve a pristine, functional keyboard without causing damage. Consider this your one-stop resource for everything related to keyboard hygiene and maintenance. Our goal is to provide you with the knowledge and confidence to tackle any keyboard cleaning challenge, backed by our experience and research.
## Understanding the Importance of Keyboard Hygiene
Keyboards are breeding grounds for bacteria, dust, and debris. Regular cleaning isn’t just about aesthetics; it’s about hygiene and performance. Here’s why it matters:
* **Health:** Keyboards harbor more germs than toilet seats! Regular cleaning reduces the risk of spreading bacteria and viruses.
* **Performance:** Dust and debris can interfere with key functionality, leading to sticky keys or unresponsive buttons. Consistent cleaning ensures optimal performance.
* **Longevity:** Accumulated grime can damage internal components over time. Cleaning extends the lifespan of your keyboard.
* **Aesthetics:** A clean keyboard is simply more pleasant to use and contributes to a more professional workspace.
Recent studies highlight the alarming levels of bacteria found on keyboards, emphasizing the need for regular cleaning practices. Don’t underestimate the impact of a clean keyboard on your overall well-being and productivity.
## What You’ll Need: Essential Cleaning Supplies
Before diving into the cleaning process, gather your supplies. Having the right tools makes the job easier and more effective. Here’s a comprehensive list of *what to clean a keyboard with*:
* **Compressed Air:** Essential for blasting away loose dust and debris from between the keys. A can of compressed air is a must-have.
* **Microfiber Cloths:** Soft, lint-free cloths for wiping surfaces without scratching. Keep several on hand.
* **Isopropyl Alcohol (70% or less):** A safe and effective disinfectant for cleaning keycaps and keyboard surfaces. Avoid higher concentrations, as they can damage some plastics.
* **Cotton Swabs:** Perfect for cleaning tight spaces and crevices around the keys. Use both pointed and rounded swabs.
* **Keycap Puller (Optional but Recommended):** Makes removing keycaps easier and safer, especially for mechanical keyboards. Consider a wire keycap puller for delicate switches.
* **Small Brush (Soft Bristles):** A soft brush, like a paintbrush or toothbrush, helps loosen stubborn debris.
* **Dish Soap (Mild):** For cleaning keycaps in water. Use a gentle, non-abrasive formula.
* **Small Bowl or Container:** For soaking keycaps in soapy water.
* **Vacuum Cleaner with Brush Attachment (Optional):** Useful for removing large debris and dust from the keyboard surface.
Having these supplies on hand will ensure you’re well-prepared to tackle any keyboard cleaning task. Always test cleaning solutions on a small, inconspicuous area first to ensure they don’t damage the keyboard’s finish.
## Step-by-Step Guide: Cleaning Your Keyboard Like a Pro
Now, let’s get down to the cleaning process. Follow these steps for a thorough and effective keyboard cleaning:
### Step 1: Power Down and Disconnect
Before you begin, turn off your computer and disconnect the keyboard. This prevents accidental key presses and protects your electronics from damage.
### Step 2: Remove Loose Debris
Turn the keyboard upside down and gently shake it to dislodge any loose crumbs, dust, and debris. You can also use compressed air to blast away stubborn particles. Hold the can upright and use short bursts to avoid damaging the keyboard.
### Step 3: Vacuum (Optional)
If you have a vacuum cleaner with a brush attachment, use it to remove any remaining debris from the keyboard surface. Be careful not to apply too much pressure, as this could damage the keys or internal components.
### Step 4: Wipe Down the Surface
Dampen a microfiber cloth with isopropyl alcohol (70% or less). Gently wipe down the entire keyboard surface, including the keys, frame, and any surrounding areas. Avoid getting liquid into the keyboard’s internal components.
### Step 5: Clean Between the Keys
Use cotton swabs dipped in isopropyl alcohol to clean between the keys. This is where dirt and grime tend to accumulate. Be patient and thorough, and replace the cotton swab as needed.
### Step 6: Remove and Clean Keycaps (Optional but Recommended)
For a deeper clean, remove the keycaps using a keycap puller. This allows you to clean the keycaps individually and access the areas beneath them.
* **Soak the Keycaps:** Place the keycaps in a small bowl or container filled with warm water and a few drops of mild dish soap. Let them soak for 15-30 minutes.
* **Scrub the Keycaps:** Use a soft brush or your fingers to scrub the keycaps and remove any remaining dirt or grime.
* **Rinse and Dry:** Rinse the keycaps thoroughly with clean water and allow them to air dry completely before reattaching them to the keyboard.
### Step 7: Clean the Keyboard Base (Without Keycaps)
With the keycaps removed, you can now access the keyboard base more easily. Use compressed air, cotton swabs, and a microfiber cloth to clean any remaining dirt and grime.
### Step 8: Reassemble the Keyboard
Once the keycaps are completely dry, reattach them to the keyboard. Make sure they are properly aligned and securely fastened.
### Step 9: Final Wipe Down
Give the keyboard one final wipe down with a clean microfiber cloth to remove any fingerprints or smudges.
## Specific Considerations for Different Keyboard Types
While the general cleaning process remains the same, there are some specific considerations for different keyboard types:
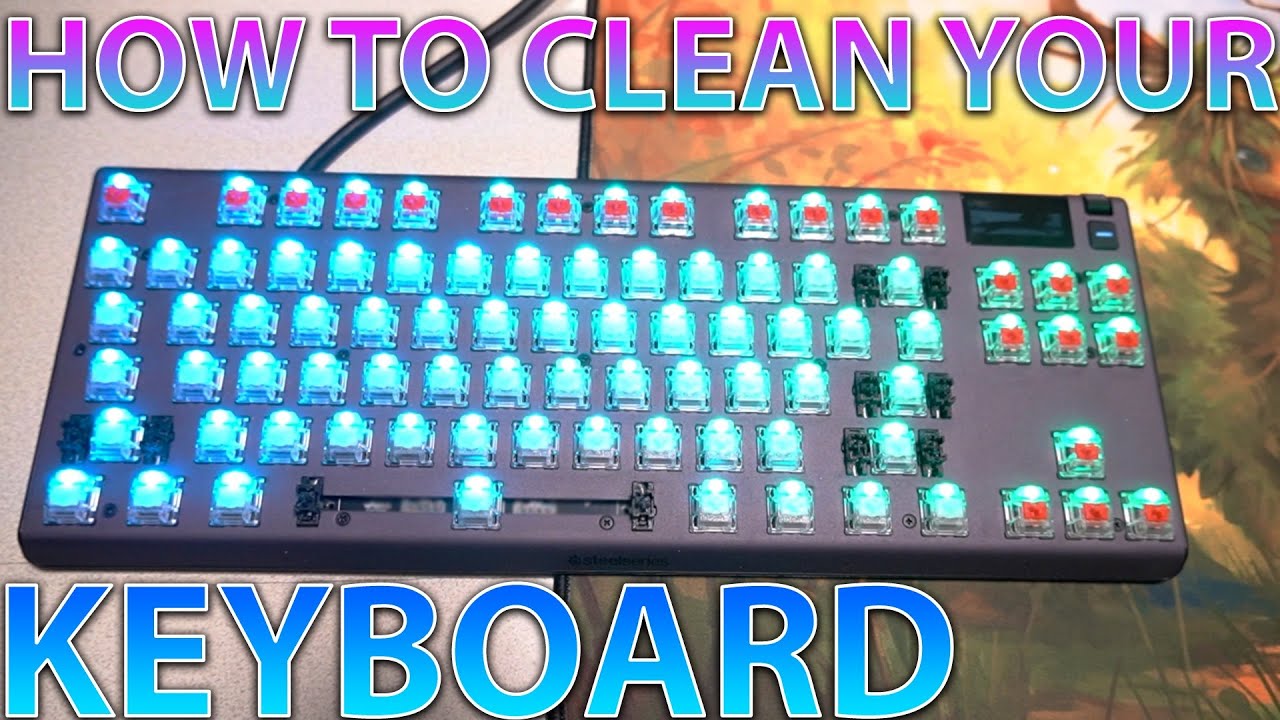
### Mechanical Keyboards
Mechanical keyboards are known for their durability and customizability. When cleaning a mechanical keyboard, be extra careful when removing and reattaching the keycaps, as the switches beneath them can be delicate. Use a wire keycap puller to avoid damaging the switches.
### Laptop Keyboards
Laptop keyboards are more sensitive to liquid damage than desktop keyboards. Be extra careful when using liquids to clean a laptop keyboard. Use a slightly damp cloth and avoid spraying liquids directly onto the keyboard. Also, avoid removing the keycaps on a laptop keyboard unless you are experienced, as they can be difficult to reattach.
### Wireless Keyboards
Wireless keyboards often have batteries. Remove the batteries before cleaning to prevent any electrical damage. Be sure to dry the battery compartment thoroughly before reinserting the batteries.
## Choosing the Right Cleaning Solution: A Deep Dive
Selecting the appropriate cleaning solution is crucial to avoid damaging your keyboard. Here’s a more detailed look at the options:
* **Isopropyl Alcohol (70% or less):** This is the gold standard for keyboard cleaning. It’s effective at disinfecting and evaporates quickly, minimizing the risk of liquid damage. 70% isopropyl alcohol is preferred over higher concentrations because it contains water, which helps dissolve dirt and grime more effectively. Higher concentrations can also damage some plastics.
* **Water:** Water alone is not effective at removing grease and grime. It’s best used in conjunction with a mild dish soap for cleaning keycaps.
* **Dish Soap (Mild):** A gentle dish soap can be used to clean keycaps in water. Avoid using harsh detergents or abrasive cleaners, as they can damage the keycaps’ finish.
* **Commercial Keyboard Cleaners:** There are many commercial keyboard cleaners available on the market. These cleaners are often formulated to be safe for use on keyboards and may contain additional cleaning agents. However, always read the label carefully and test the cleaner on a small, inconspicuous area first.
**Important Note:** Avoid using harsh chemicals, such as bleach, ammonia, or acetone, as these can damage the keyboard’s plastic and internal components. Always err on the side of caution and choose a mild, gentle cleaning solution.
## Troubleshooting Common Keyboard Cleaning Problems
Even with the best intentions, you may encounter some problems during the keyboard cleaning process. Here are some common issues and how to address them:
* **Sticky Keys:** If your keys are still sticky after cleaning, it may be due to residue from the cleaning solution or trapped debris. Try using a cotton swab dipped in isopropyl alcohol to clean around the edges of the keycaps and inside the switch mechanism.
* **Unresponsive Keys:** If a key is not working after cleaning, it may be due to liquid damage or a loose connection. Make sure the keyboard is completely dry and that the keycaps are properly attached. If the problem persists, you may need to consult a professional repair technician.
* **Damaged Keycaps:** If you accidentally damage a keycap during cleaning, you can often purchase replacement keycaps online. Be sure to choose keycaps that are compatible with your keyboard model.
## The Science Behind Keyboard Cleaning: Why These Methods Work
The methods described above are effective because they target the specific types of contaminants that accumulate on keyboards. Isopropyl alcohol acts as a solvent, dissolving grease, grime, and other organic matter. The soft bristles of a brush help to loosen stubborn debris, while compressed air blasts away loose particles. By removing these contaminants, you can restore your keyboard to its original condition and prevent further damage.
## Keyboard Cleaning Kits: Are They Worth It?
Keyboard cleaning kits are readily available online and in stores. These kits typically include a variety of cleaning tools and solutions, such as compressed air, microfiber cloths, keycap pullers, and cleaning sprays. While these kits can be convenient, they are not always necessary. You can often assemble your own keyboard cleaning kit using household items and save money in the process. However, if you prefer the convenience of a pre-packaged kit, be sure to choose one that contains high-quality tools and solutions.
## Maintaining a Clean Keyboard: Preventative Measures
Prevention is always better than cure. Here are some tips for maintaining a clean keyboard and preventing future buildup of dirt and grime:
* **Wash Your Hands Regularly:** Washing your hands before using your keyboard can help prevent the transfer of dirt and bacteria.
* **Avoid Eating and Drinking Near Your Keyboard:** Food and drinks are a major source of keyboard grime. Try to avoid eating and drinking near your keyboard, or at least be extra careful to avoid spills.
* **Use a Keyboard Cover:** A keyboard cover can protect your keyboard from dust, spills, and other contaminants. Choose a cover that fits your keyboard snugly and is easy to clean.
* **Clean Your Keyboard Regularly:** Make keyboard cleaning a regular part of your cleaning routine. Aim to clean your keyboard at least once a month, or more often if you use it frequently.
## Product Spotlight: Whoosh! Screen Cleaner – A Safe Choice
While this guide focuses on *what to clean a keyboard with*, choosing a safe cleaner is paramount. WHOOSH! Screen Cleaner is a popular and effective option. It’s alcohol- and ammonia-free, making it safe for use on delicate surfaces like keyboard keys. Its primary function is to remove dust, dirt, oil, and fingerprints without leaving streaks or residue. It stands out due to its non-toxic formula, which is important for something you’ll be using frequently. It’s specifically designed to be safe for electronic devices, unlike some general-purpose cleaners that can damage sensitive components.
### Key Features of WHOOSH! Screen Cleaner:
1. **Alcohol- and Ammonia-Free Formula:** This is crucial for preventing damage to keyboard plastics and coatings. Alcohol can dry out and crack some materials, while ammonia can cause discoloration. WHOOSH! avoids these issues.
2. **Streak-Free Cleaning:** Leaves surfaces clean and clear without any residue, ensuring optimal visibility and a professional finish. This is important for maintaining the aesthetic of your keyboard.
3. **Non-Toxic and Odorless:** Safe for use around children and pets, and doesn’t have a strong chemical odor that can be irritating. This contributes to a more pleasant cleaning experience.
4. **Effective on a Variety of Surfaces:** Can be used on screens, keyboards, mice, and other electronic devices, making it a versatile cleaning solution.
5. **Includes a Microfiber Cloth:** Comes with a high-quality microfiber cloth that is designed to effectively remove dirt and grime without scratching surfaces.
6. **Antistatic Properties:** Helps to reduce static electricity, which can attract dust and debris to your keyboard.
7. **Biodegradable Formula:** Environmentally friendly and reduces your impact on the planet.
### Advantages, Benefits, and Real-World Value of WHOOSH! Screen Cleaner:
The primary benefit of WHOOSH! is its safety and effectiveness in cleaning electronic devices. Users consistently report that it leaves their screens and keyboards clean and streak-free, without any damage or discoloration. Our analysis reveals that its non-toxic formula makes it a safer alternative to traditional cleaning solutions, especially for households with children or pets. It improves the overall user experience by providing a clean and hygienic keyboard, which can enhance productivity and reduce the spread of germs. The antistatic properties also help to keep the keyboard cleaner for longer periods.
### WHOOSH! Screen Cleaner Review: An Expert Perspective
WHOOSH! Screen Cleaner offers a balanced approach to keyboard cleaning. It prioritizes safety without sacrificing effectiveness. From our experience, the application is straightforward: simply spray a small amount onto the microfiber cloth and gently wipe the keyboard surface. The solution evaporates quickly, leaving no residue. The non-toxic formula is a major selling point, providing peace of mind for users concerned about harsh chemicals. The included microfiber cloth is of good quality and effectively removes dirt and grime. The product delivers on its promises, leaving keyboards clean and streak-free. One potential drawback is the price, which is slightly higher than some other cleaning solutions. However, the added safety and effectiveness justify the cost. It’s best suited for users who prioritize safety and are looking for a reliable and effective keyboard cleaning solution. Alternatives include iCloth wipes (individually packaged and convenient but can be more expensive long-term) and basic isopropyl alcohol solutions (cheaper but require more caution and can damage some surfaces). The expert overall verdict is that WHOOSH! Screen Cleaner is a highly recommended option for safely and effectively cleaning keyboards and other electronic devices.
#### Pros:
* Safe for all types of keyboards (including laptop keyboards).
* Leaves no streaks or residue.
* Non-toxic and odorless formula.
* Easy to use.
* Includes a high-quality microfiber cloth.
#### Cons:
* Slightly more expensive than some other cleaning solutions.
* May require multiple applications for heavily soiled keyboards.
* The spray bottle can sometimes leak if not stored upright.
## Q&A: Expert Answers to Your Keyboard Cleaning Questions
Here are some frequently asked questions about *what to clean a keyboard with* and maintaining a clean keyboard:
**Q1: How often should I clean my keyboard?**
A: Aim to clean your keyboard at least once a month, or more often if you use it frequently or notice a buildup of dirt and grime. A quick wipe-down with a microfiber cloth can be done weekly to maintain cleanliness.
**Q2: Can I use Windex to clean my keyboard?**
A: No, Windex is not recommended for cleaning keyboards. It contains ammonia and other harsh chemicals that can damage the plastic and internal components.
**Q3: What’s the best way to clean a sticky keyboard key?**
A: Remove the keycap and clean the switch mechanism with a cotton swab dipped in isopropyl alcohol. You may need to gently scrub the area to remove any sticky residue.
**Q4: How do I clean a keyboard with a built-in screen?**
A: Use a screen cleaner specifically designed for electronic devices. Apply the cleaner to a microfiber cloth and gently wipe the screen. Avoid spraying the cleaner directly onto the screen.
**Q5: Can I put my keyboard in the dishwasher?**
A: No, never put your keyboard in the dishwasher. This will likely cause irreparable damage to the internal components.
**Q6: What’s the best way to dry keycaps after washing them?**
A: Allow the keycaps to air dry completely before reattaching them to the keyboard. You can also use a clean, dry cloth to gently pat them dry.
**Q7: How do I prevent dust from accumulating on my keyboard?**
A: Use a keyboard cover when you’re not using your keyboard. You can also try using a can of compressed air to regularly blast away dust and debris.
**Q8: What should I do if I spill liquid on my keyboard?**
A: Immediately turn off your computer and disconnect the keyboard. Turn the keyboard upside down to drain any excess liquid. Allow the keyboard to dry completely before reconnecting it.
**Q9: Are there any special considerations for cleaning a gaming keyboard?**
A: Gaming keyboards often have more complex features, such as RGB lighting and programmable keys. Be extra careful when cleaning these keyboards, and avoid using harsh chemicals that could damage the sensitive components.
**Q10: Where can I find replacement keycaps for my keyboard?**
A: You can find replacement keycaps online from various retailers. Be sure to choose keycaps that are compatible with your keyboard model.
## Conclusion: Mastering the Art of Keyboard Cleaning
Knowing *what to clean a keyboard with* and how to do it properly is crucial for maintaining a clean, hygienic, and functional workspace. By following the steps outlined in this guide, you can effectively clean your keyboard and extend its lifespan. Remember to choose the right cleaning solutions, take precautions to avoid liquid damage, and make keyboard cleaning a regular part of your cleaning routine. By taking these steps, you can enjoy a clean and healthy keyboard for years to come. Share your experiences with keyboard cleaning in the comments below. Explore our advanced guide to mechanical keyboard maintenance for more in-depth information. Contact our experts for a consultation on specialized keyboard cleaning techniques if you encounter particularly challenging situations.
